Build your app
How to Create an App
Our instructions lead you step-by-step through design of an application with sample screens to guide you along the way.
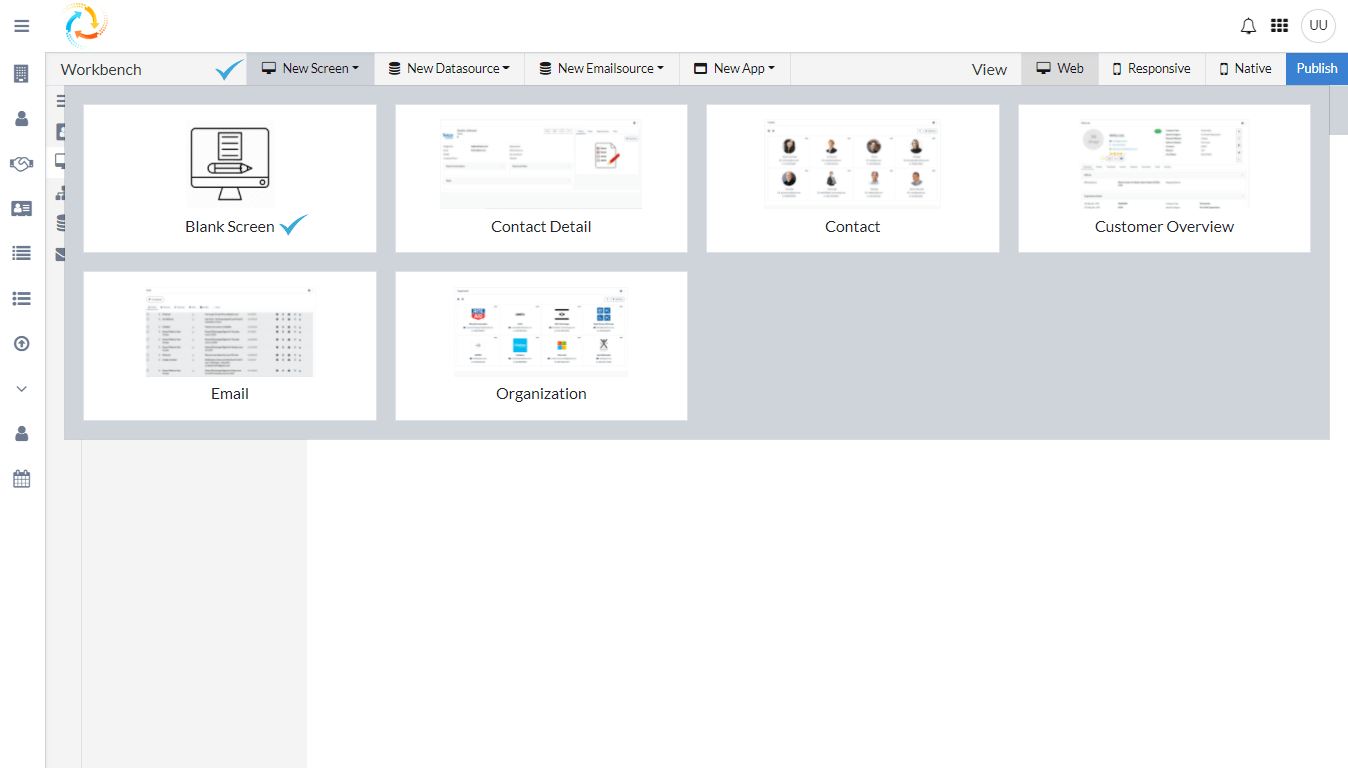
1. Select your application screen
Log into the NCAMEO platform. Then select the “New Screen” tab. You can use the “Blank Screen” option or the pre-existing templates to get you started.

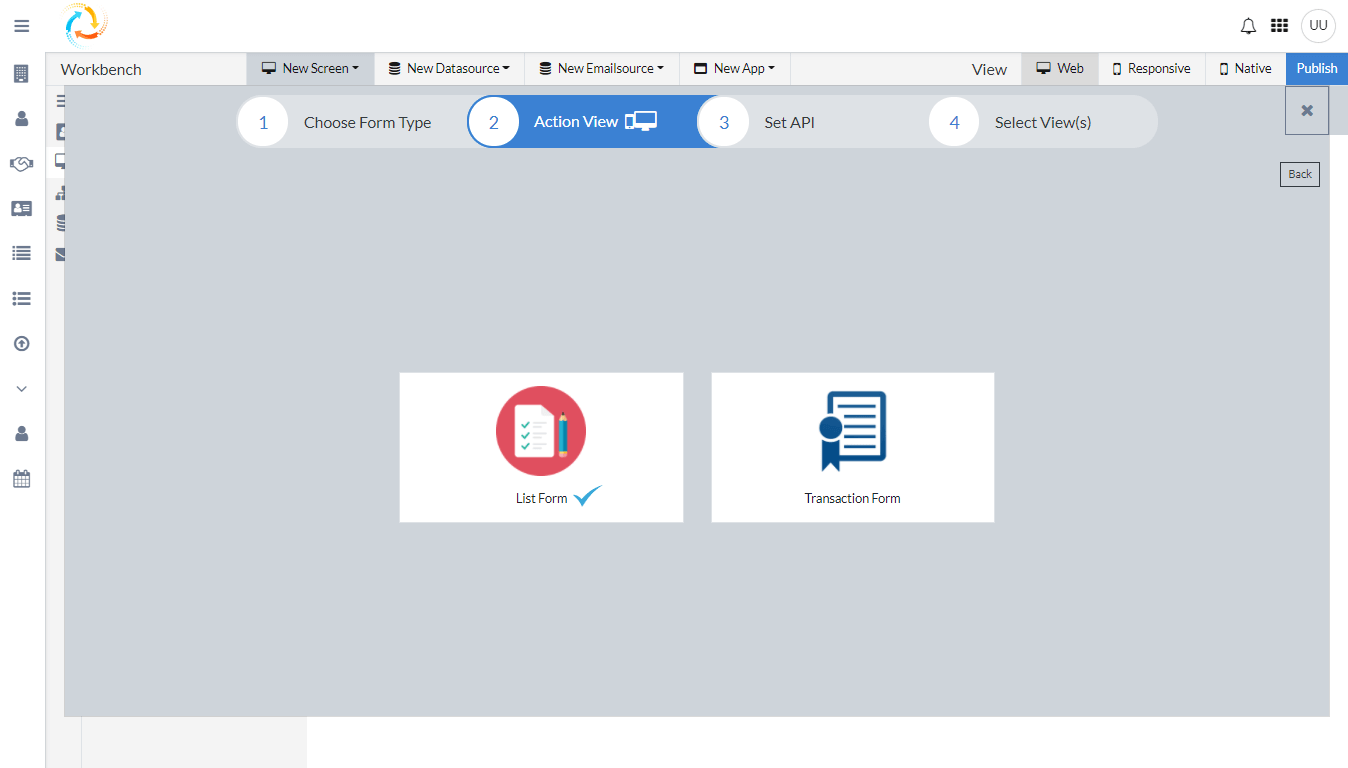
2. Action View
After selecting “Blank Screen”, choose the type of form you want to create, either a “List Form” or a “Transaction Form”.
Select”List Form” to create specific visuals from your data. “Transaction Form” is used when capturing data fields.
Below, we select “Transaction Form”.

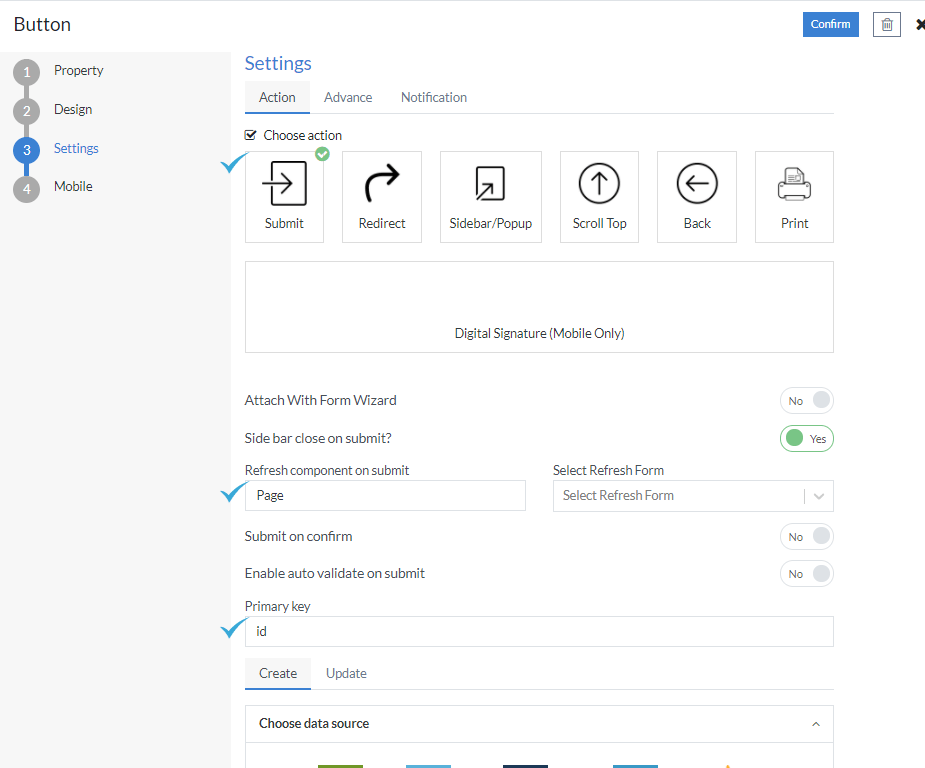
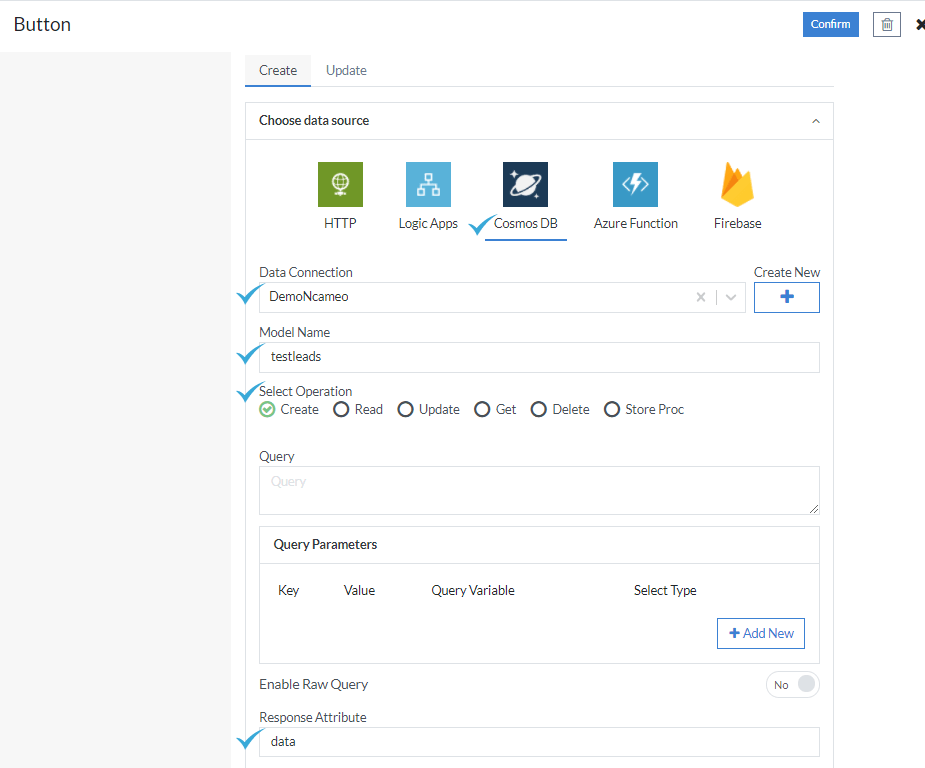
3. Set Create API and Configure Submit Button for Transaction Form
Following your form selection, you will set the API details. First, fill out the required fields which includes “Data Connection”, “Model Name”, “Operation”, “Query”(if any), and “Query Parameters” to name a few. This allows you to establish the correct API connection.
Finally, you can update the control properties of the Button and place it in your form.


4. Add Controls
Next, add “Controls”. Then, under the “Screen” tab, select the “Add New” button. This allows you to add additional controls.
Clicking on the “Add New” button opens up a form in the side bar laying out all the available options. Add as many controls as needed.
Click on the required control and add it to the form by configuring its properties, view, API, and buttons linked to it.

5. Add Form Name
Next, update or add the Form Name. For example, below, we are using the form name “Create Lead”.

6. Set Get API
Next, configure the Get API. Follow the steps as done in Step three, however the operation here will change to “Get”.

7. Create new form to Configure Cards in Grid View
After completing the Transaction Form, you will configure the view you want to represent the captured data. Follow the steps as step one & step two and select “List Form” here.
8. Set up GET API for List
Following your form selection, you will set the API details. Configuring API will be similar to step three, however the operation here will change to “Read”.

9. Select Layout or Visual Type
After filling in all the required API fields, select the appropriate view from the six available options.
Here, we are going ahead with “Card View”.

10. Add Form Name
Next, update the form name. Below, we are using the form name as “Leads”.

11. Configure Grid View
Next is configuring “Grid View” in a seven steps form wizard.
Click the “Property” tab in the form wizard. From here, populate the “Attributes” field with your required attributes, ensuring that the attributes have no spaces.
Next we will set up the “View”. Fill out the required fields as per your application parameters. You can also pull up images in your card view by configuring the image URL.
12. Configure Grid View
Next we will configure the fields required for “Data” step. This involves data and API configurations.

13. Configure Grid View
Next is the “Mapping” step, in which you will map the captured data fields that you wish to display on the cards.

14. Configure Grid View
Next we will complete the “Action” step by configuring the custom action buttons such as “View”, “Edit”, “Delete”, and others.

15. Configure Grid View
Next, we have the “Advance” step to set up advanced visuals on the cards. Advance visuals include images, charts, or custom initials.
The last step configures the settings you want to use for mobile viewing. This will determine how the app displays in the native mobile view.

16. Configure Add Form to the List View
After completing both “Transaction Form” and “List Form”, link both the forms together and create an application screen.
Click on “Setting” tab and then toggle the “Show Add Form Link” to “On”.
Next update the “Button Text”, “Button Class”, and “Button Icon” fields.
Next select the “Action View” and provide the name of Transaction Form in “Add/Edit FormId” which is to be linked together.

17. Adding Application Screen to Navigation Menu