Check List
You have to go through a three-step form wizard to enable this Control, i.e., Design, API & Advance. Let’s explain these steps below:
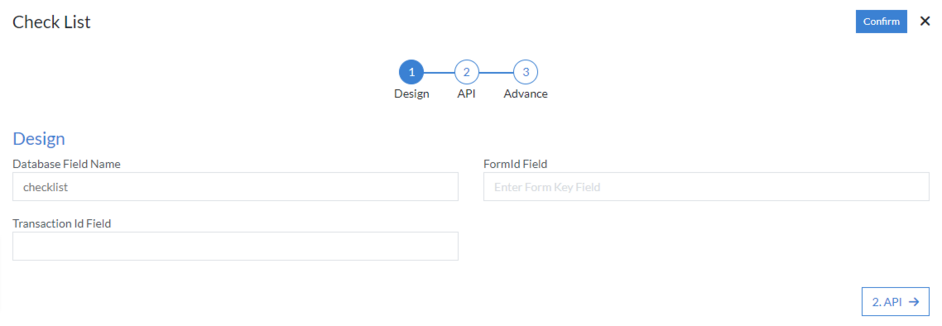
1st Step – Design
- Database Field Name (mandatory): These are the attributes of the form
- FormId Field
- Transaction Id Field
2nd Step – API
-
Configure data source: Select data source from the following
HTTP, Workflow, No SQL or RDBMS
-
HTTP
- Data Connection
- Method (mandatory): Select method from the following GET, PUT, POST, PATCH, DELETE or POCO
- API URL (mandatory)
-
Query Parameters
- Key
- Value
- Query Variable
- Select Type
-
Headers
- Name
- Value
-
Others
- Enable raw query
-
HTTP
- Enable Encryption
- Response Attribute

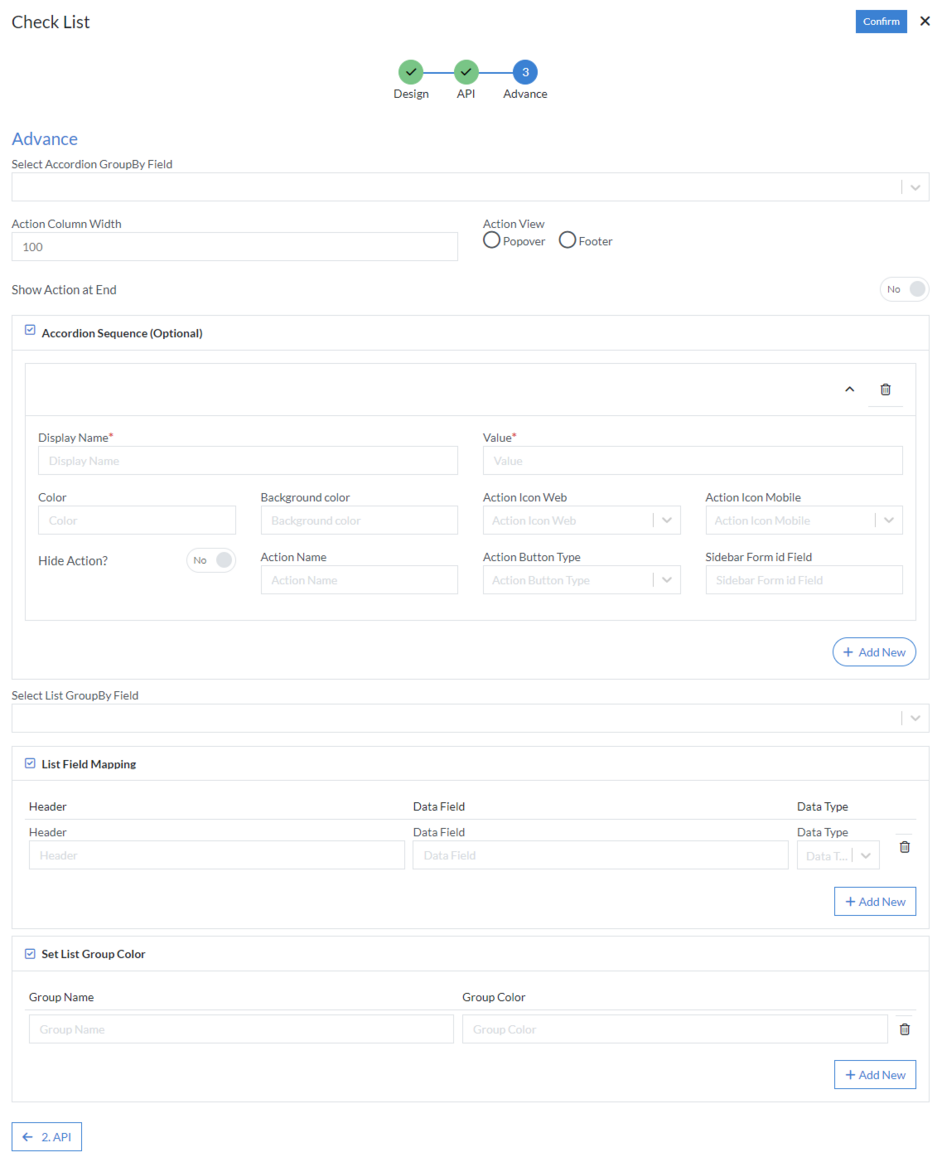
3rd Step – Advance
- Select Accordion GroupBy Field: Select from options available in dropdown
- Action Column Width
- Action View: Popover or Footer
- Show Action at End
-
Accordion Sequence (Optional)
- Display Name (mandatory)
- Value (mandatory)
- Color
- Background Color
- Action Icon Web
- Action Icon Mobile
- Hide Action
- Action Name
- Action Button Type
- Sidebar Form Id Field
- Select List GroupBy Field: Select option from dropdown list
-
List Field Mapping: Manually enter multiple rows of data in the
grid by clicking “Add New” button and define the following
fields
- Header
- Data Field
- Data Type: Choose data type from the following None, Email, Date, Title, Image, etc.
-
Set List Group Color: Manually enter multiple rows of data in
the grid by clicking “Add New” button and define the following
fields
- Group Name
- Group Color
Click “Confirm” and “Check List” control is configured.