Timeline
You have to go through a three-step form wizard to enable this Control, i.e., Design, API & Advance. Let’s explain these steps below:
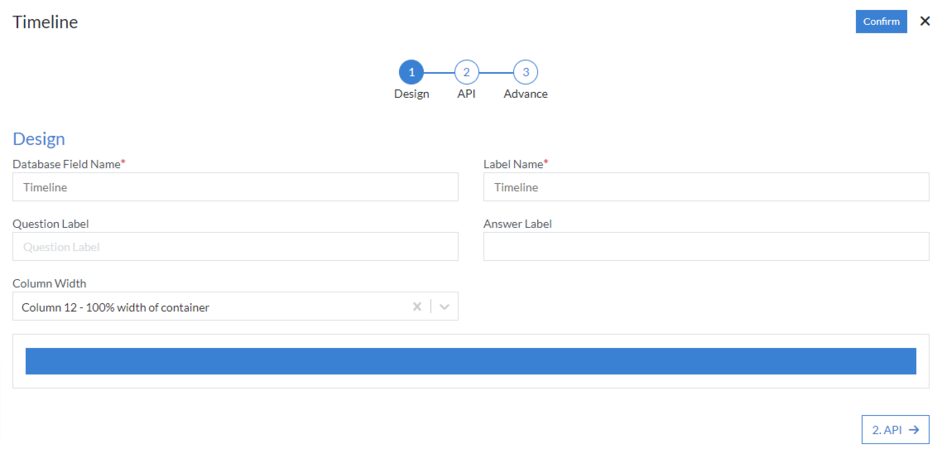
1st Step – Design
- Database Field Name (mandatory): Defines the name of the database field to which the component's data will be mapped and stored.
- Label Name (mandatory): Specifies the display name or title for a field or control in the user interface.
- Question Label: The label used to represent a question or prompt in the form.
- Answer Label: The label used to represent the answer or response to a question in the form.
- Column Width: Specifies the width of a column in a layout or grid system, allowing control over how much space the column occupies relative to others.
2nd Step – API
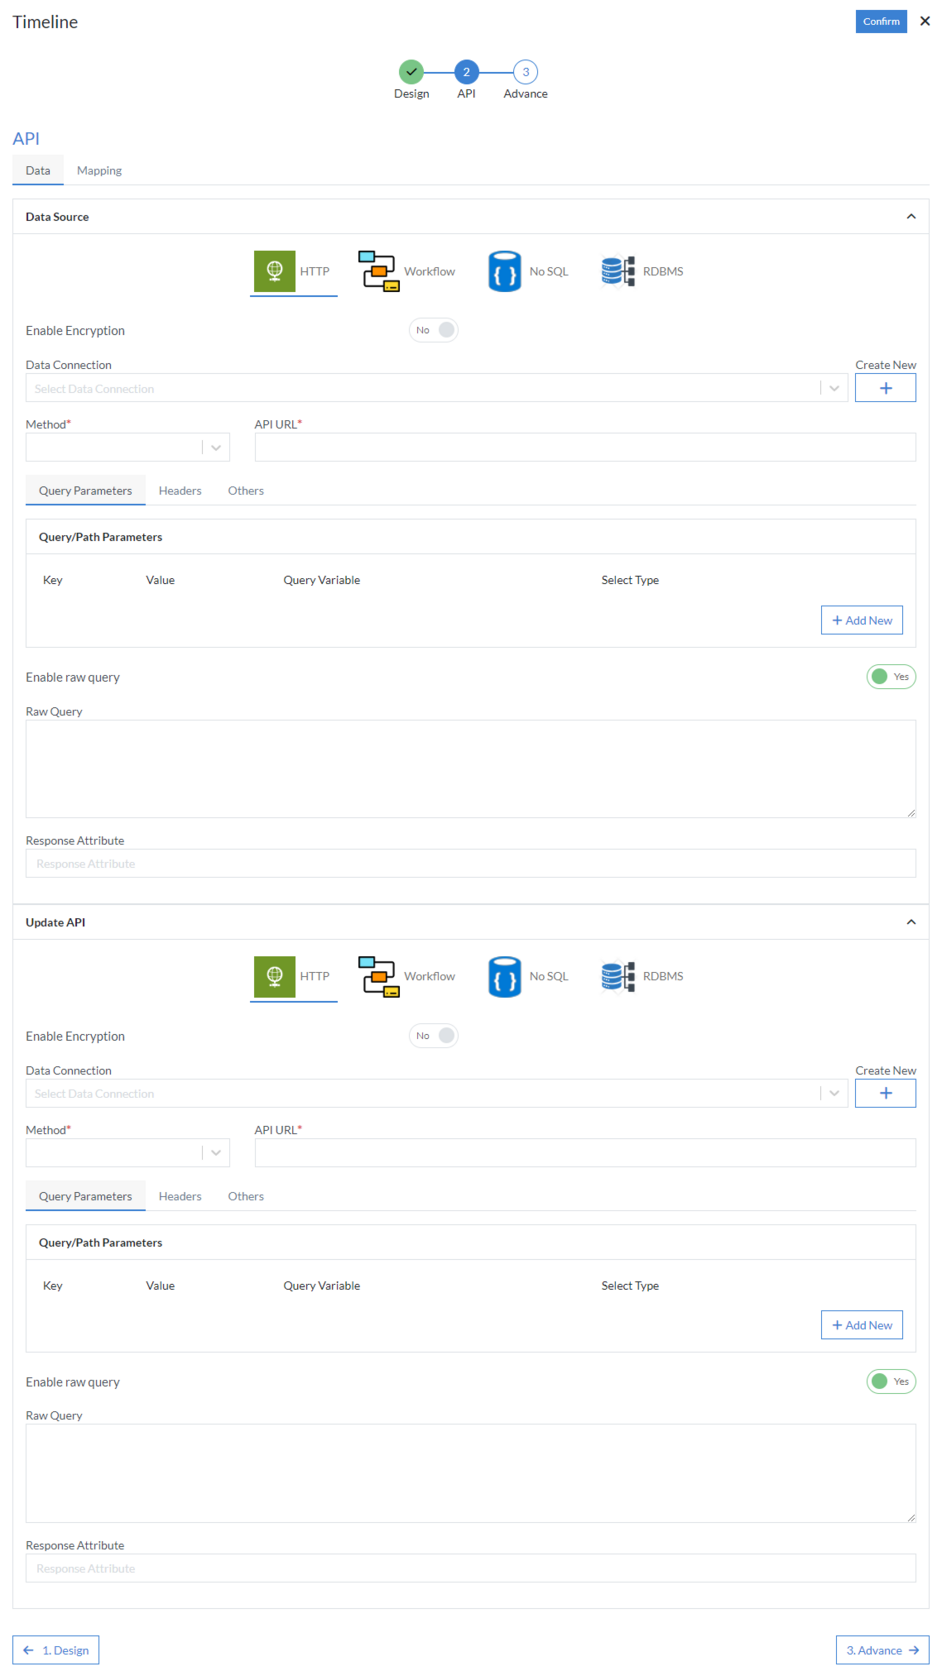
- Data
-
Choose Data Source: Select data source from the following HTTP, Workflow, No SQL or RDBMS.
-
HTTP: A method for connecting to external data via HTTP protocol.
- Data Connection: The connection settings required to establish communication with the data source.
- Method: (mandatory) Select method from the following GET, PUT, POST, PATCH, DELETE or POCO.
- API URL: (mandatory) The URL used to connect to the API endpoint.
-
Query Parameters: Additional data to be passed in the request.
- Key: The name of the query parameter.
- Value: The value associated with the query parameter.
- Query Variable: A variable that can be used within the query.
- Select Type: The type of data the query is selecting.
-
Headers: Additional metadata for the request.
- Name: The name of the header.
- Value: The value associated with the header.
-
Others: Additional options for the request.
- Enable raw query: Option to send raw query without processing.
- Enable Encryption: Option to encrypt the data in the request for security.
- Response Attribute: The data to be received from the API response.
-
HTTP: A method for connecting to external data via HTTP protocol.
-
Update API: A section to configure the API settings for updates.
-
HTTP: Same configuration as the HTTP data source used for updating API information.
- Data Connection: The connection settings required to establish communication with the data source.
- Method: (mandatory) Select method from the following GET, PUT, POST, PATCH, DELETE or POCO.
- API URL: (mandatory) The URL used to connect to the API endpoint for updating data.
-
Query Parameters: Additional data to be passed in the update request.
- Key: The name of the query parameter.
- Value: The value associated with the query parameter.
- Query Variable: A variable that can be used within the query.
- Select Type: The type of data the query is selecting.
-
Headers: Additional metadata for the request.
- Name: The name of the header.
- Value: The value associated with the header.
-
Others: Additional options for the update request.
- Enable raw query: Option to send raw query without processing.
- Enable Encryption: Option to encrypt the data in the request for security during update.
- Response Attribute: The data expected to be received from the API after updating.
-
HTTP: Same configuration as the HTTP data source used for updating API information.
- Mapping
-
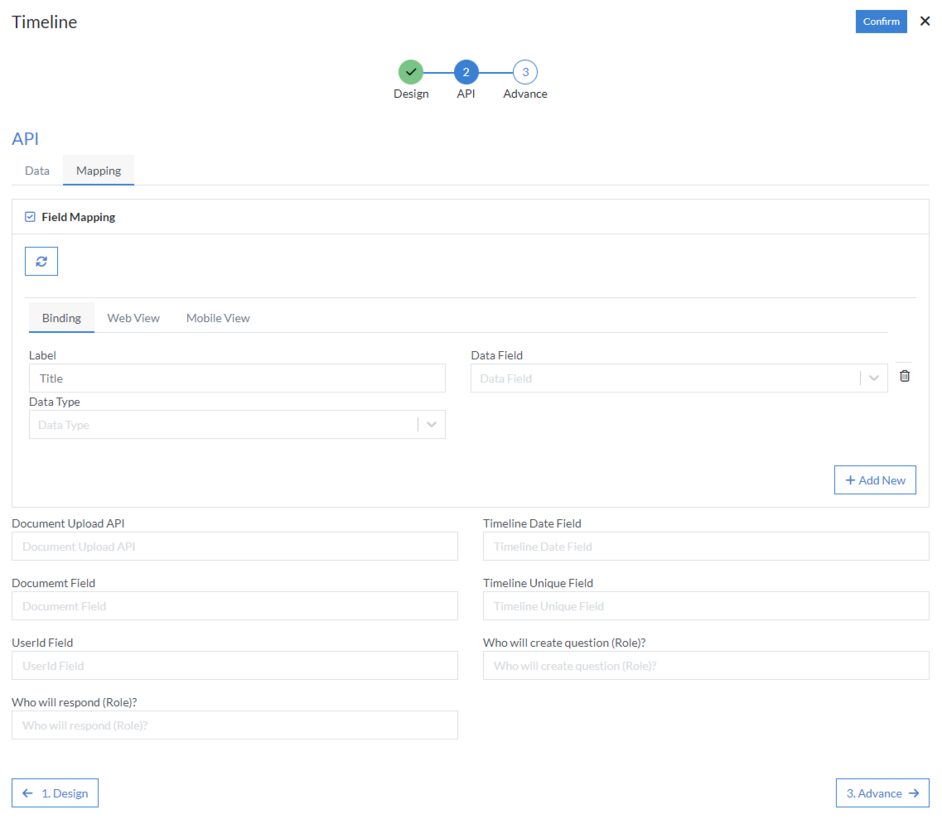
Field Mapping: Click on “Add New” button depending on how many fields you want to map in the grid based on the requirement. After clicking the refresh button to reload the API response, start mapping the following fields.
-
Binding: This refers to the connection of form fields to API response fields.
- Label: The label displayed for the field.
- Data Field: From API – The corresponding field in the API data.
- Data Type: Choose the data type from the following options: None, Email, Date, Title, Image, etc.
-
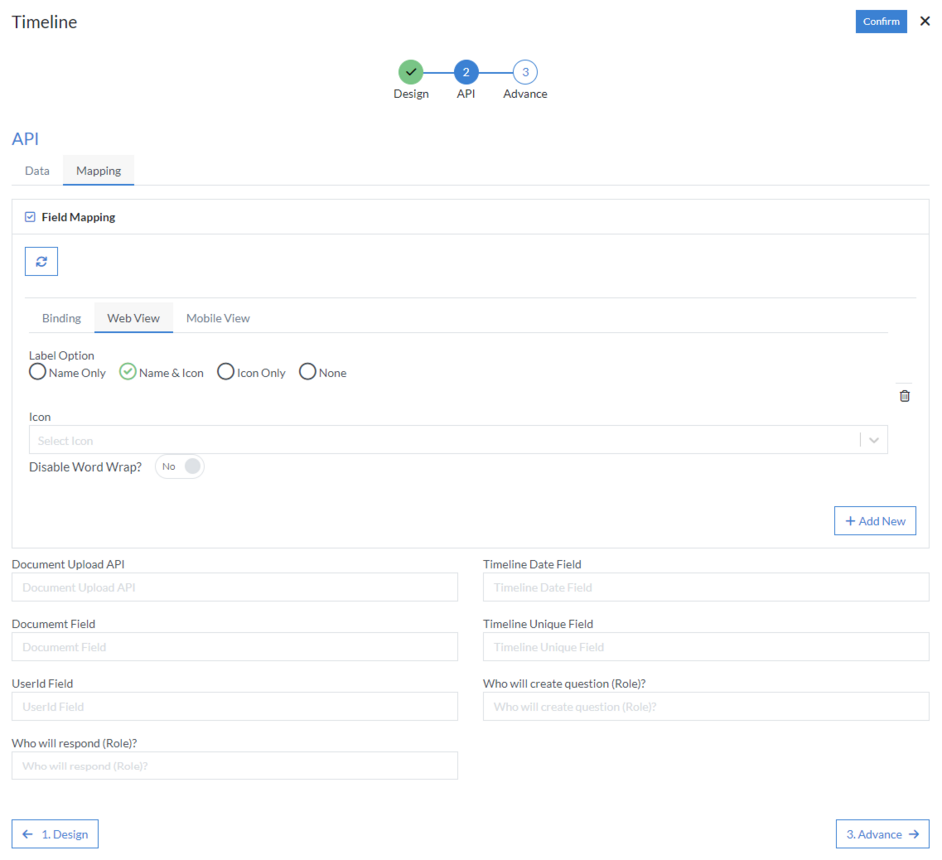
Web View: Configuration for how the field appears in web view.
- Label Option: Select label option from the following: Name Only, Name & Icon, Icon Only, or None.
- Disable Word Wrap: Option to disable word wrapping in the label text.
-
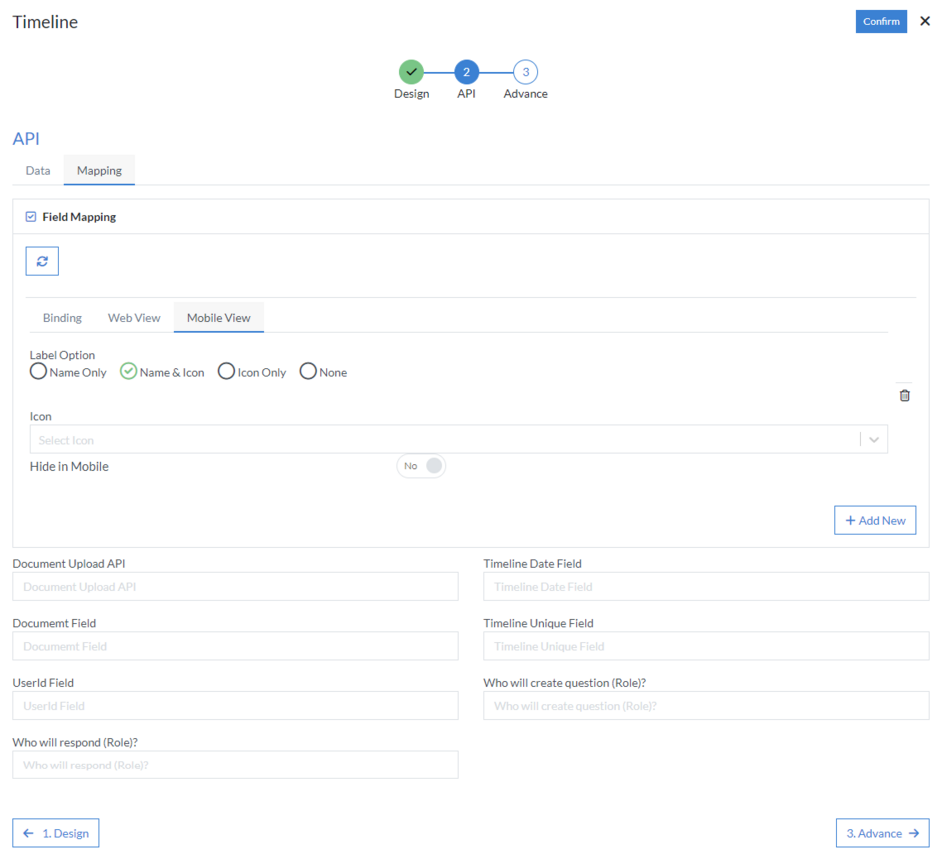
Mobile View: Configuration for how the field appears in mobile view.
- Label Option: Select label option from the following: Name Only, Name & Icon, Icon Only, or None.
- Hide in Mobile: Option to hide the field in mobile view.
-
Binding: This refers to the connection of form fields to API response fields.
- Document Upload API: The API used for uploading documents.
- Timeline Date Field: The field that stores the date of a timeline event.
- Document Field: The field that stores the document related to the form.
- Timeline Unique Field: The unique identifier field used for timeline entries.
- User Id Field: The field storing the ID of the user who is involved in the process.
- Who will create question (Role): The role responsible for creating the question.
- Who will respond (Role): The role responsible for responding to the question.
3rd Step – Advance
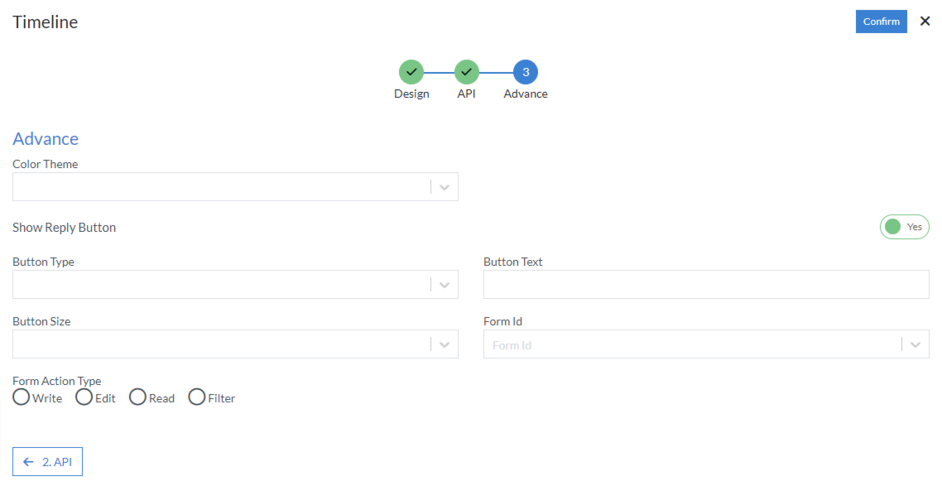
- Color Theme: Select the color theme option from the dropdown menu.
-
Show Reply Button: Configure the visibility and settings for a reply button.
- Button Type: Select the button type from the dropdown menu.
- Button Text: The text displayed on the button.
- Button Size: Select the button size from the dropdown menu.
- Form Id: Select the form ID from the dropdown menu.
- Form Action Type: Select the form action type from the following options: Write, Edit, Read, or Filter.
Click “Confirm” and “Timeline” control is configured.